Understanding the New FABRIC Layer 3 Connection
Multi-site experiments with FABRIC: Sometimes Layer 3 is all you need
- March 18, 2024 by
- Michael Sherman
Greetings, Chameleon users! For our Tips and Tricks this month, we're diving into an exciting development that enhances our testbed capabilities - the FABRIC Layer 3 connection. This addition is part of our continued effort to provide you with powerful, flexible networking options for your experiments.
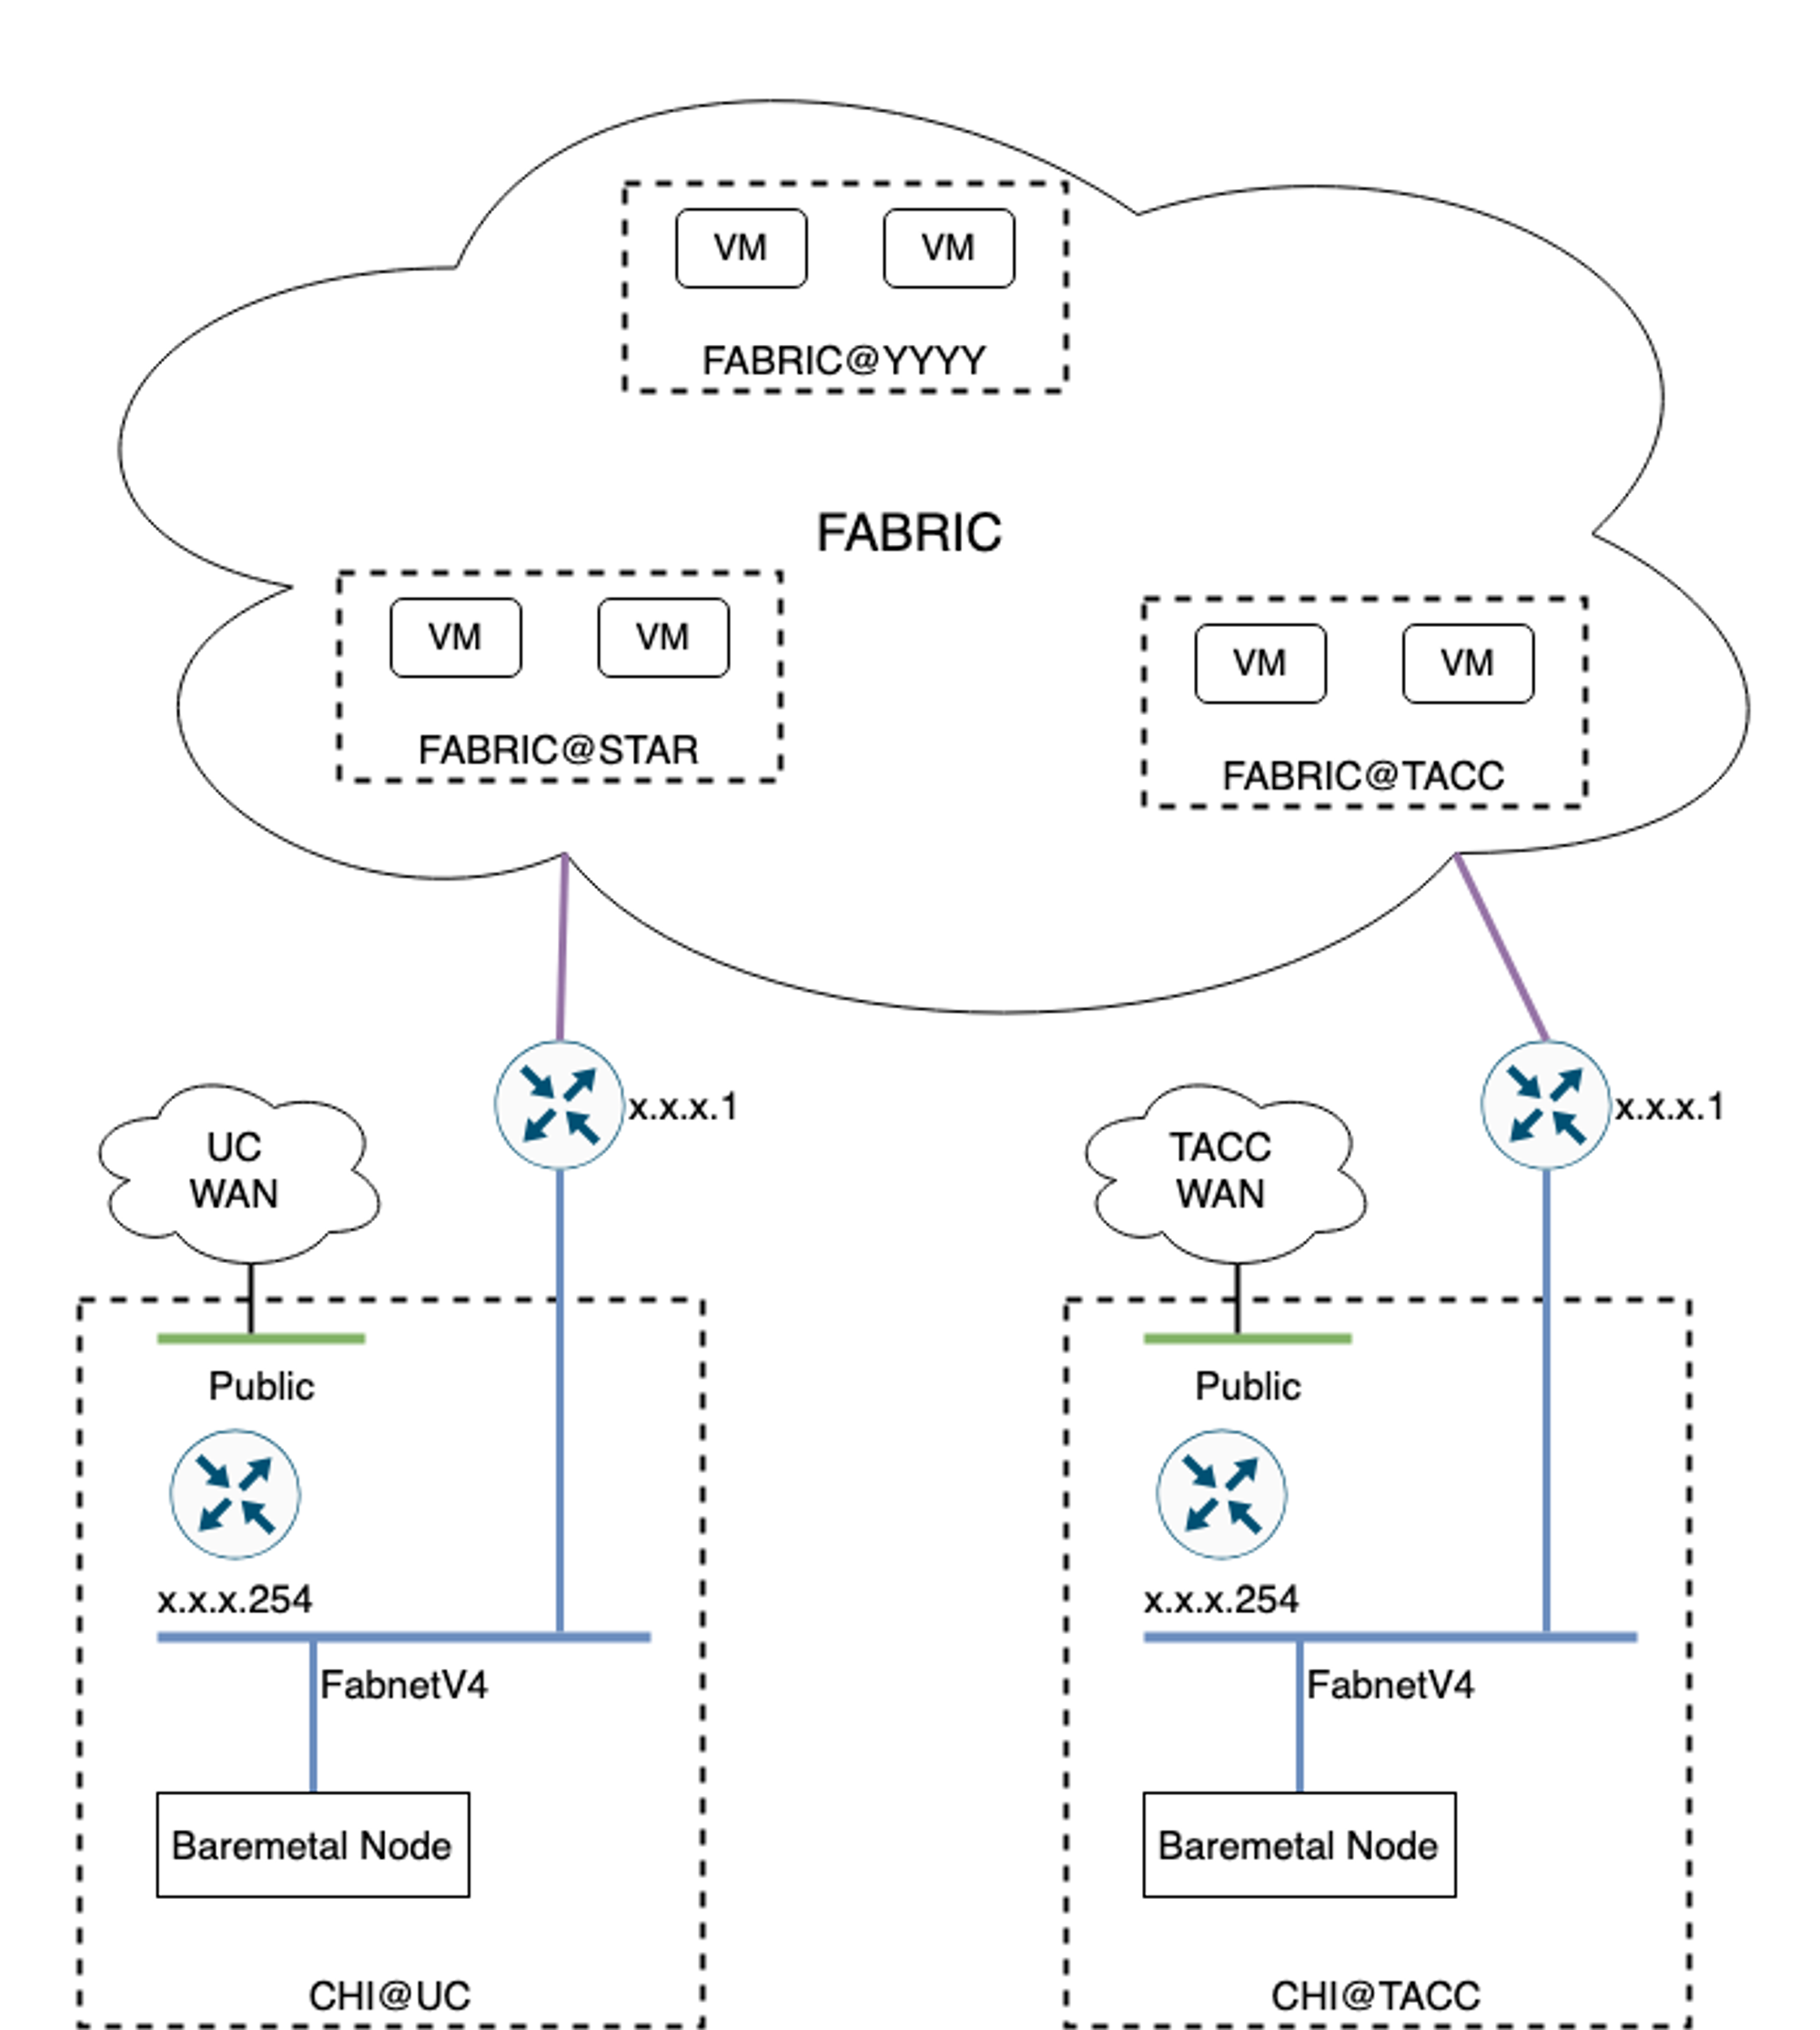
Figure 1: Diagram of fabnet Layer 3 Connection
FABRIC, like Chameleon, is an NSF-funded testbed, but with a focus on networking capabilities. In 2023, we became proud hosts of the first FABRIC facility port at our University of Chicago Chameleon site (CHI@UC). And, we've previously added support for Layer 2 stitching to FABRIC, which allows you to create an experiment using resources on both testbeds. This month, we've taken this a step further and set up a shared network at both CHI@UC and CHI@TACC that routes to the FABRIC internal network.
What does this mean for you? For starters, this means you can route to FABRIC resources without having to set up custom Layer 2 stitching for common cases. This simplifies the process and allows you to focus more on your experiments.
But the benefits don't stop there. Even if you're not a FABRIC user, you can take advantage of this network to route traffic between CHI@UC and CHI@TACC. This is a significant improvement over routing via public IPs. Using the FABRIC network between sites gives you lower latency and higher bandwidth than floating IPs - up to 25Gb/s per flow. And all this without the need to set up FABRIC resources and reserve a Chameleon stitched network.
To get started using this connect, see our documentation, or follow these brief steps:
- Identify the Fabnet network: At available sites, you can see the fabnetv4 network in Horizon or by executing the following command:
OS_CLOUD=tacc openstack network show fabnetv4 --fit-width. This will provide detailed information about the network. - Launch a server on fabnet: Use the following command to launch a server on fabnet:
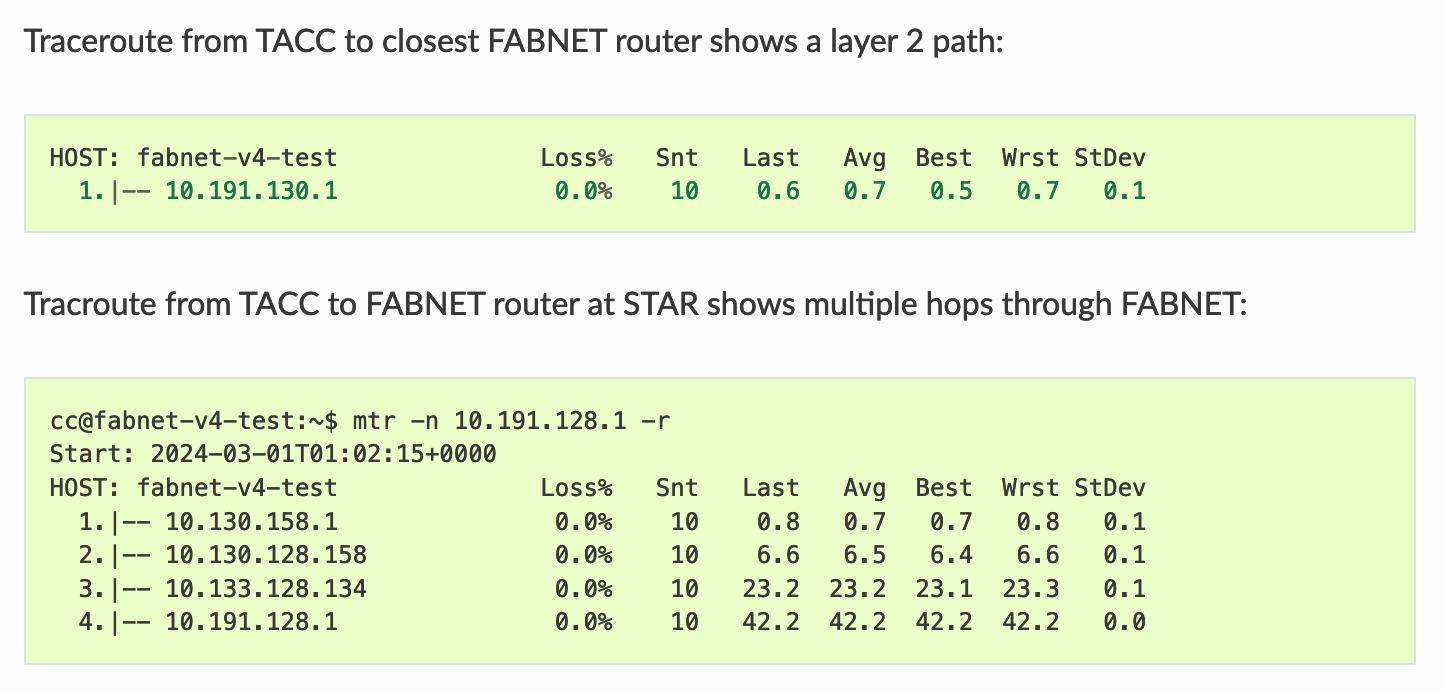
openstack server create --network fabnetv4 ..<other options="" usual="">.Please note that the fabnet router will not send traffic to the public internet. As with any other isolated network, all internet-bound traffic will still traverse a neutron router at the Chameleon site.</other> - Check the new paths: After launching your instance, you can use traceroutes to demonstrate the new paths. For example,
mtr -n 8.8.8.8 --reportcan be used to traceroute from TACC to Google public DNS which still traverses the Neutron router, whilemtr -n 10.191.130.1 --reportwill traceroute to the FABRIC router at TACC.
If you’re looking for something more interactive, our artifact on Chameleon Trovi demonstrates sending traffic between CHI@UC or CHI@TACC and a FABRIC slice using the "fabnetv4" layer 3 network. While the fabnet connection provides low latency and high bandwidth, it may not be the optimal choice for all experiments. Be sure to check your requirements and test your setup to ensure it meets your needs.
Whether you're a FABRIC user or not, this development is fantastic news. It opens a world of possibilities for your experiments and simplifies the process of sending traffic between sites. Stay tuned for more tips and tricks to help you make the most of your Chameleon experience. Remember, this network is publicly available at CHI@TACC and CHI@UC. Happy experimenting!
FABRIC: Updated Trovi Example for using FABRIC with Chameleon
- May 22, 2023 by
- Paul Ruth
Our friends at FABRIC have recently updated their FABRIC/Chameleon Trovi artifact. It's full of interesting examples to check out.
FABRIC’s First FacilitlyPort: Deploying Experiments Spanning Chameleon and FABRIC
- Aug. 24, 2022 by
- Paul Ruth
We are excited to announce the first FABRIC facility port at Chameleon’s University of Chicago site. With this facility port, users can deploy experiments that span Chameleon and FABRIC.
No comments