Choosing the right orchestration in Chameleon
- May 29, 2020 by
- Mauricio Tavares
A frog in a well cannot conceive of the ocean.
Zhuangzi
As with many projects and programming languages, there is more than one way to achieve a task when orchestrating Chameleon computing and network resources. As a result, experimenters may feel overwhelmed and choose to stick to the orchestration method they are familiar with even when another method might be more effective for the task in hand.
In this article, we will take a quick look at the orchestration methods most commonly used in Chameleon and then we will compare them in two ways:
-
Interactiveness: how easy to change its parameters. If you control each step separately, you can adjust the lab to deal with experiment variations and even unexpected issues.
-
Automation: how little user intervention is required for it to run. The more automated it is, the faster you can set the experiment up. An added bonus is you minimize the amount of user-induced mistakes.
The Players
Within this article, four different methods for orchestration will be explored:
There are pros and cons for each method, depending on your goals. Continue reading to better understand the different values and how to narrow down which will work best for your experience.
#1 Web Interface
Web Interface is the method users encounter by default when logging into https://www.chameleoncloud.org/, watching the Intro to Chameleon webinar, and reading the getting started documentation. From this web interface, you can visually explore the available and used resources, examine the network(s) associated with the experiment and how they relate with themselves and the servers (a.k.a. instances), add (or remove) public floating IPs to instances, and restart and have console access to these instances.
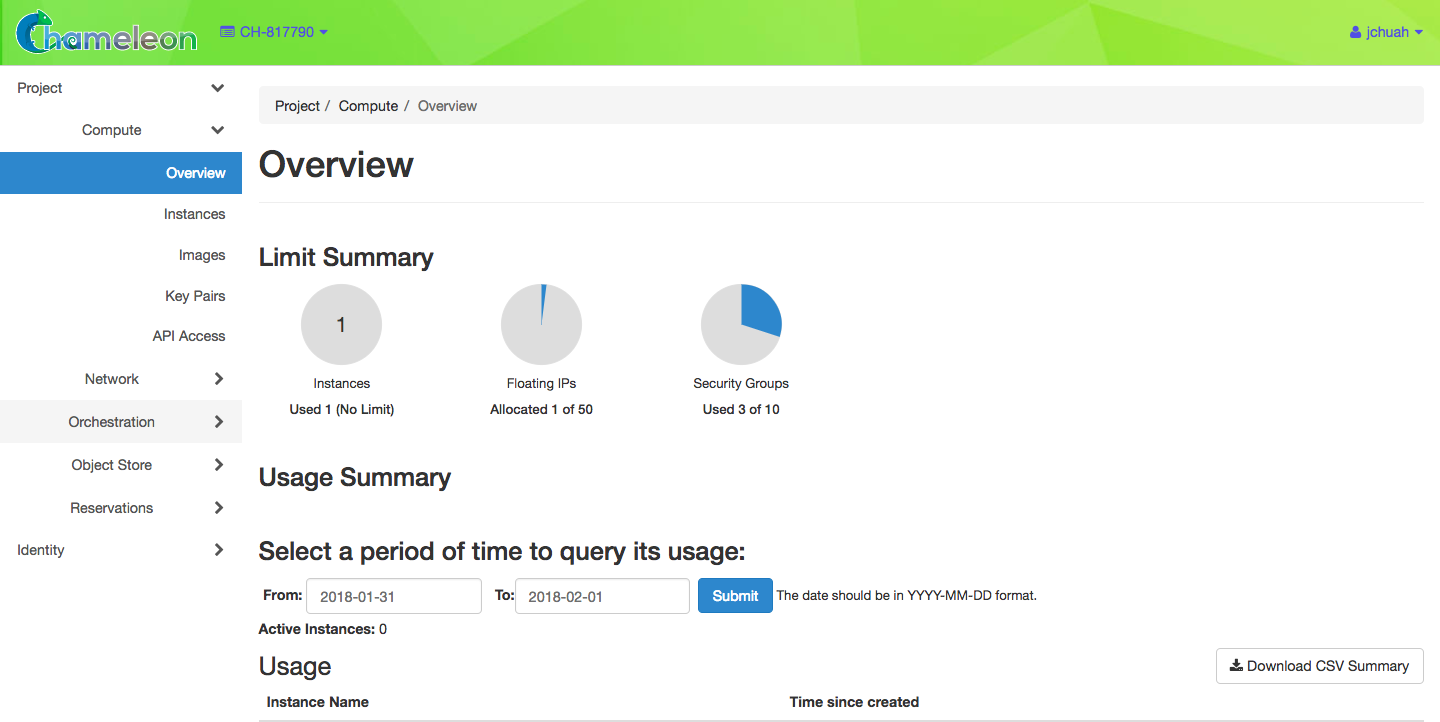
Pros
- Easiest to learn.
- No programming or scripting skills required. Identifying which OS images are available, visualizing which resources our virtual lab uses, or selecting a public key is but a mouse click away.
- Can see how each step is doing in real time.
- Great for a quick test without having to write a bunch of lines of code first.
- Most interactive. It can modify the lab infrastructure on the fly in ways that are not available to other methods. Specifically, it allows us to have console access to the instances we created.
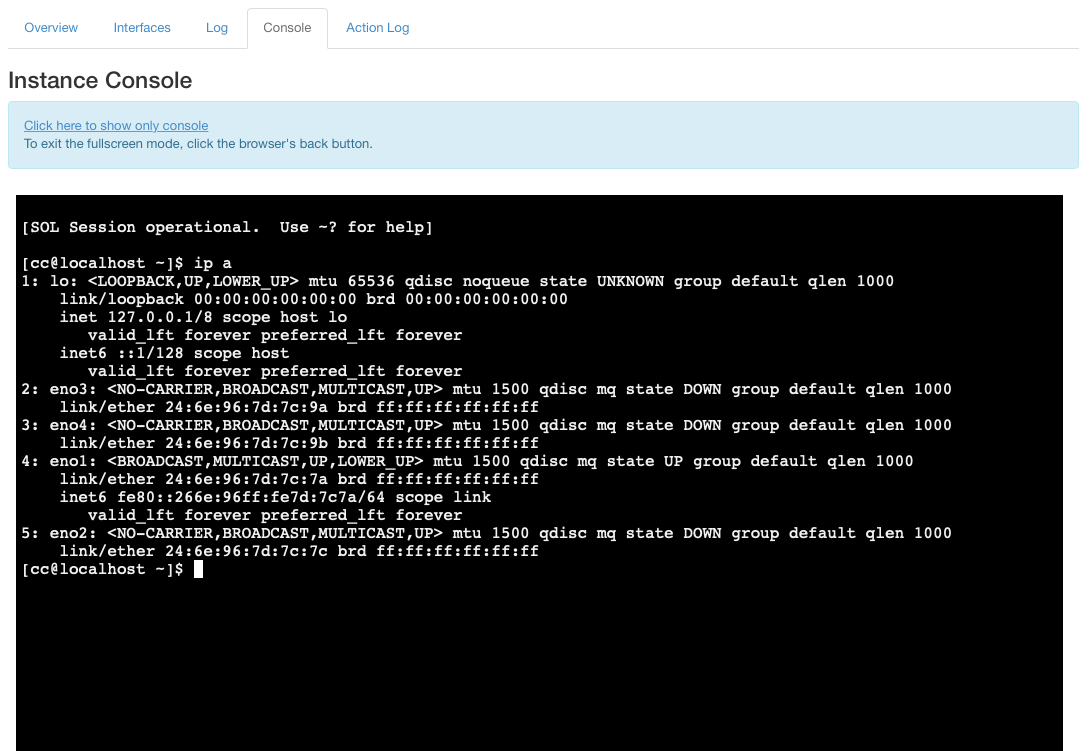
- Having console access allows investigating network issues from within the instance.
Cons
- Slow.
- Labor-intensive.
- Manual, least automated.
- Easy to miss one step.
#2 “Vanilla” Jupyter
A Jupyter Notebook is a great way to combine documentation and executable code in a single entity. Learn more about this method by watching the Orchestration with Jupyter Notebooks webinar and reviewing the online documentation.
Pros
- Reproducible. Repeating the entire experiment is just a matter of restarting the notebook.
- Can see the output inside the Jupyter Notebook be it graphics or text.
- Great as Textbook/lab manual.
- Diagrams.
- Interactive: If an user wants to make a change to run a what-if-scenario (great for those who learn better by changing parameters to see the outcome), editing the right field and running it again is all that is required.
- Text with code you can run! Notebooks show which step was executed in which order, and with supporting documentation including links right with the step being executed.
- Users/Students can follow each step and see the outcome without worrying about typos.
- Linking to other notebooks will launch them.
- Once you have a good notebook, you can build a new one by duplicating it and then editing. Or copying the good bits from other notebooks. You do not need to reinvent the wheel.
- What you tell the instances to do is limited to your ability to describe it using the command line. For instance, why not connect from your Notebook to a node and then tell it to check out a git repo and then build that package?
Cons
- Some programming or scripting skills required. Youtalk to openstack with scripts written in Bash to orchestrate the networks and instances, but can also use Python. Therefore, you need to know how to talk to openstack from the command line in either of those scripting languages.
- Unless you also write a script to verify if required intermediate steps are successfully executed before continuing, you may end up in a broken state without knowing which step caused the problem. You would then need to manually issue the command line to delete enough resources to get to a state you can continue. Notebooks students are supposed to run (class exercises and labs) should be able to decide when to continue and when to safely abort.
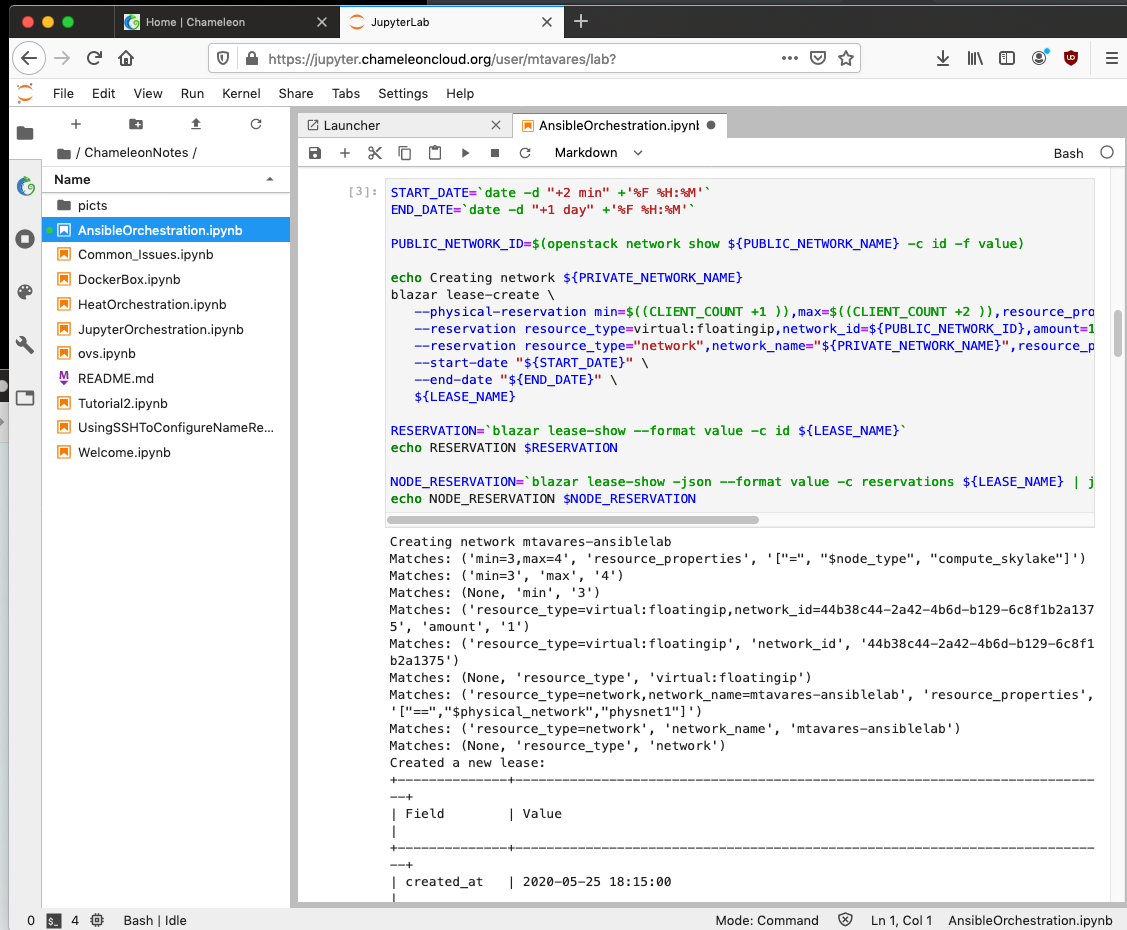
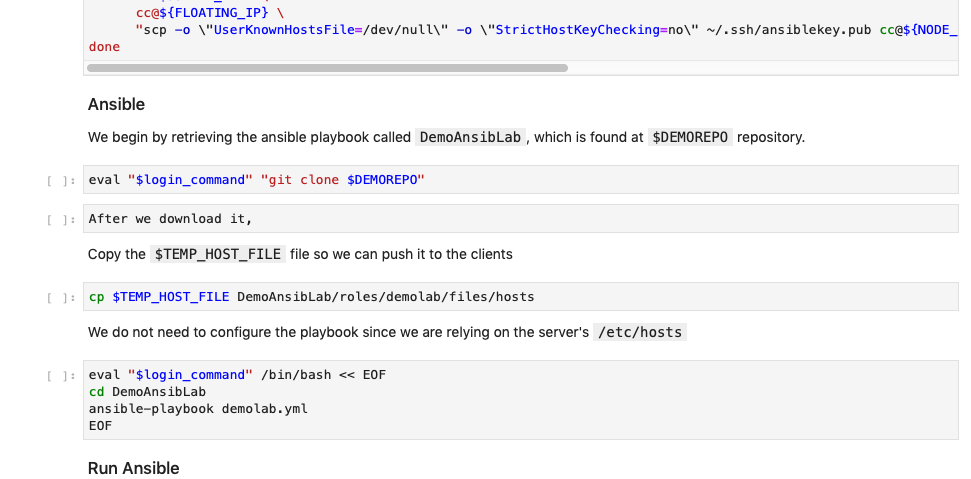
#3 Jupyter + Ansible
Use Jupyter Notebook to spool up the instances with only the OS. Install ansible (also applicable to puppet/salt) and its playbooks (in the following image we are getting them from a git repo), and then run the playbooks.
Pros
- Can automate many steps in the experiment setup that needs to be documented. In fact, the ansible playbook can be part of the documentation.
- Steps -- detecting the operating system, updating a configuration file, installing packages, starting services -- that would need to be spelled out (and are slightly different for distinct Linux distributions) in the normal Jupyter Notebooks are well-defined in Ansible; no need to write functions to perform those tasks.
- Ansible playbooks can be constructed to run on different platforms such as baremetal instance, a virtual computer (say, KVM or VirtualBox), or kubernetes. Clever coding can make it adjust itself to work in the environment. Case in point, in our Jupiter + Ansible notebook, the two servers running the experiment are running different Linux distributions -- Ubuntu and CentOS -- and the playbook not only adapts to that but uses that to make decisions. That also means playbook can be developed and tested somewhere else and then run on Chameleon… or the other way around. Or, if experiment uses Chameleon and other resources which are linked together, they can be configured using one single playbook.
- To change the experiment parameters on specific hosts one needs only to edit the configuration file for that host.
- If you love Python, you will be happy here as Ansible is python based.
Cons
- Much more programmatically intensive. If you do not know how to program in Python, you may struggle here (Ansible is python based).
- One of the most time consuming steps -- creating the instances -- is still being done explicitly in the Jupyter Notebook (you have to run every single step in order).
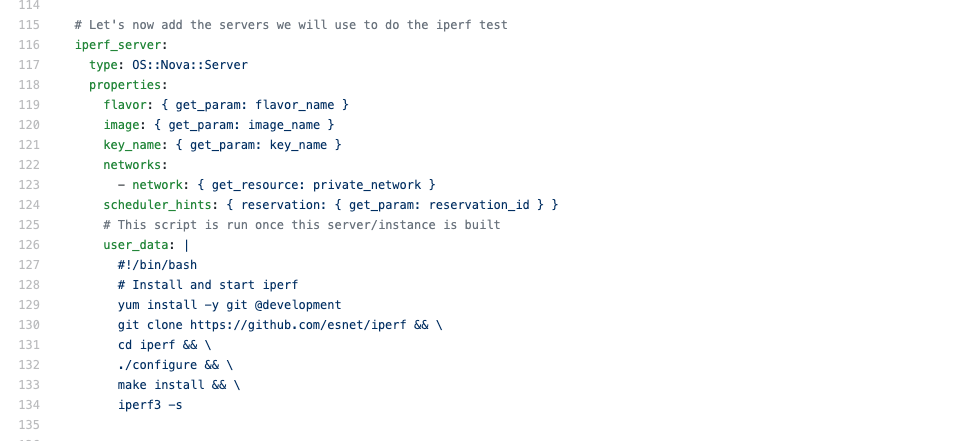
#4 Heat Templates
This is how Chameleon generates its complex appliances. Customize a few parameters, launch it, and then come back when the entire lab is set up; no user interaction from starting until it is complete. As shown in its webinar, we can execute it from the command line (which means it can be done from within Jupyter Notebooks) or Web GUI.
Pros
- You no longer need to interactively make reservations and allocate resources. The heat template can do that for you and then configure them, even calling, say, ansible playbooks as needed.
- Can create a somewhat generic one so you can select network, ssh keys, OS images and so on before unleashing it.
- Destroying the entire experiment is done with one single command. Chameleon then works the heat template backwards.
- Of the 4 orchestration methods presented, it is the most automated.
- Can run scripts during the installation that checks repos out, compiles code, moves files and so on. If that becomes too long, just have it use ansible.
Cons
- Least Interactive of the list.
- Heat templates can become complex rather quickly and are a new “language” to master.
- Cannot easily reconfigure a server. it would require recreating the instance. The work around is for the heat template install and run ansible so you can push updates later on.
Comparing Methods
The following table shows how the orchestration systems mentioned here are distributed in an Interactiveness vs Automation matrix. As expected, while heat templates are very automated, they are not very interactive. The web GUI is very interactive but not automated. The other two techniques are somewhere in the middle.

In the above graph, Jupyter Notebook + Ansible is a bit more interactive and distinctively more automated than plain Jupyter. That is to emphasize the effect of adding Ansible to the equation - it cuts down the number of steps required to accomplish a task and simplifies running them in complex/mixed environments. If a given set of tasks defined in ansible have to be rerun across all the instances, we just need to go to the notebook step where the variables are defined, rerun it with updated variables, and then rerun the step that executes the ansible playbook.
Choosing a Method
Which one should you pick? It depends on where in the interactiveness vs automation graph you want to be.
- If introducing someone to Chameleon, the Web GUI is the best method.
-
If creating lab assignments for students, the Jupyter Notebooks by themselves or with Ansible provide a balance of automation while providing real time/interactive training.
-
If setting up a complex experiment in a repetitive and automated fashion, heat templates would be the best choices.
With that said, once you have enough experience with those orchestration methods, the next step is mixing and matching them: creating a Jupyter notebook (keeping notes in a single location) that runs a fully automated orchestration, like heat template, to do the basic building of the lab (instances, networks, floating IPs, etc). Then it installs and runs something like ansible to deploy the required packages and files that will perform the experiments. But, that will be for another article...
No comments