Software Defined Networking with OpenFLow on Chameleon
- Aug. 17, 2018 by
- Paul Ruth
Do you have a software-defined networking (SDN) experiment but do not have exclusive access to your own OpenFlow switch? Or maybe you have an experiment with non-standard networking requirements that can not be supported by traditional learning switches. If so, you might be interested in using Chameleon’s new Bring-Your-Own-Controller (BYOC) functionality. This new capability enables users, like you, to create and control your own exclusive OpenFlow switch that connect your Chameleon nodes.
BYOC is part of the expanded deployment for Chameleon’s phase 2. It enables tenants to allocate OpenFlow switches controlled by their own OpenFlow controller. This capability is limited to the phase 2 hardware additions that include the Corsa DP2000 series OpenFlow switches and Skylake compute nodes. The Corsa switches allow for the creation of mutually isolated forwarding contexts that function as OpenFlow switches. Each forwarding context isolates traffic between users and connected to a user-defined OpenFlow controller residing within Chameleon or on an external host.
The easiest way to get started working with OpenFlow on Chameleon is with the OpenFlow: Quick Start Appliance. This complex appliance can be used to create a full OpenFlow experiment including a Ryu OpenFlow controller, an OpenFlow network, and a couple of nodes that use the network. Detailed directions are included with the appliance. Feel free to modify the code in the controller to manipulate the network switch.
Tip: Modify the Ryu OpenFlow controller by editing simple_switch_13_custom_chameleon.py and restarting the Ryu controller service.
> vim /opt/ryu/simple_switch_13_custom_chameleon.py
> systemctl restart ryu
After gaining a bit of experience with the Quick Start Appliance you may want to incorporate OpenFlow into your own experiments. You can create OpenFlow switches on Chameleon using either the CLI or a complex appliance (it is currently not possible to create OpenFlow switches using the horizon GUI directly). Directions for using the CLI are documented here. However, we recommend using a complex appliance to create your OpenFlow networks.
Note: we recommend using complex appliances to create almost all experiment. If you are not using complex appliances then you should consider learning about them.
We have provided a complex appliance that creates a basic OpenFlow network connected to an OpenFlow controller of your choice. The OpenFlow BYOC Network appliance creates a network and the corresponding subnet and router to make it useful on Chameleon. You will, of course, need to have your own OpenFlow controller to make the network traffic flow. Conveniently, you can use the Ryu OpenFlow Controller appliance to run a controller on Chameleon.
Example
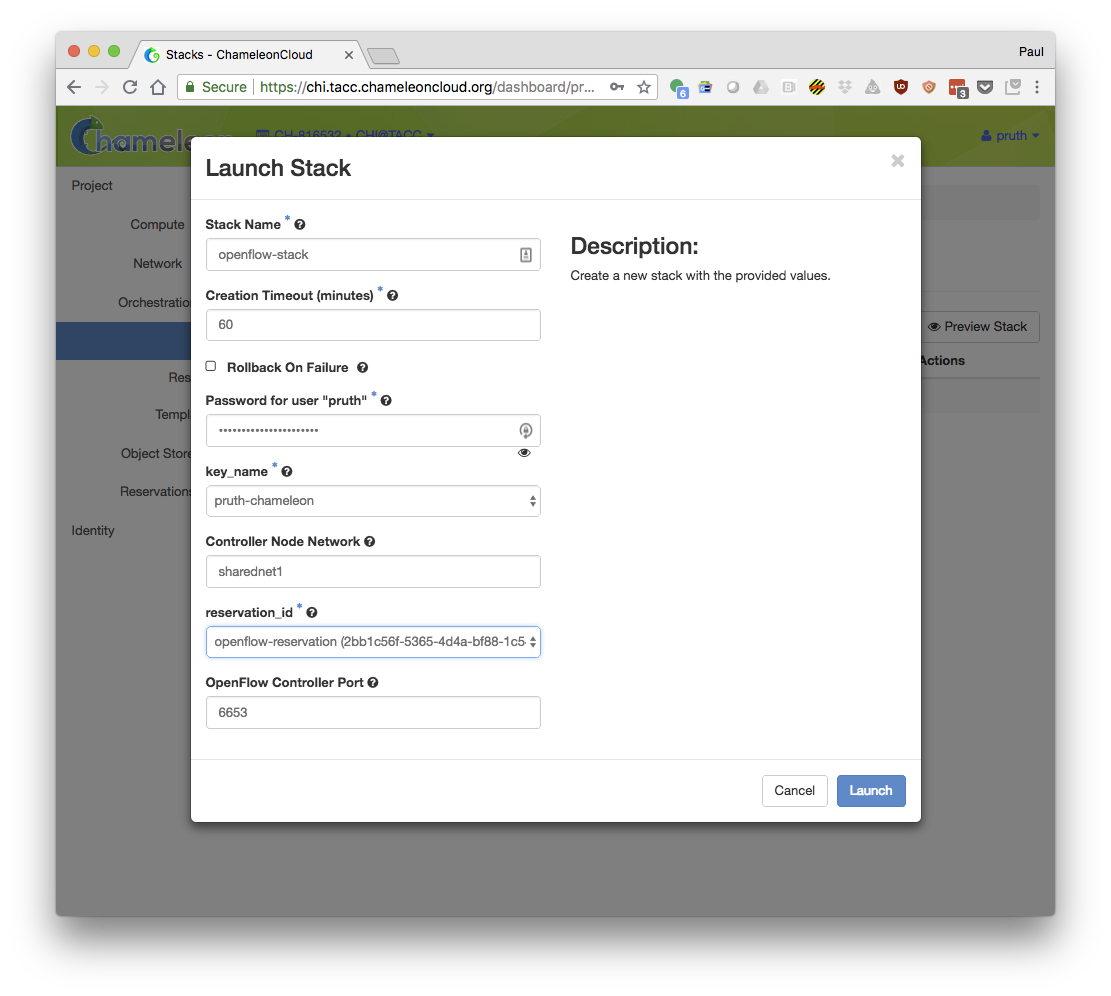
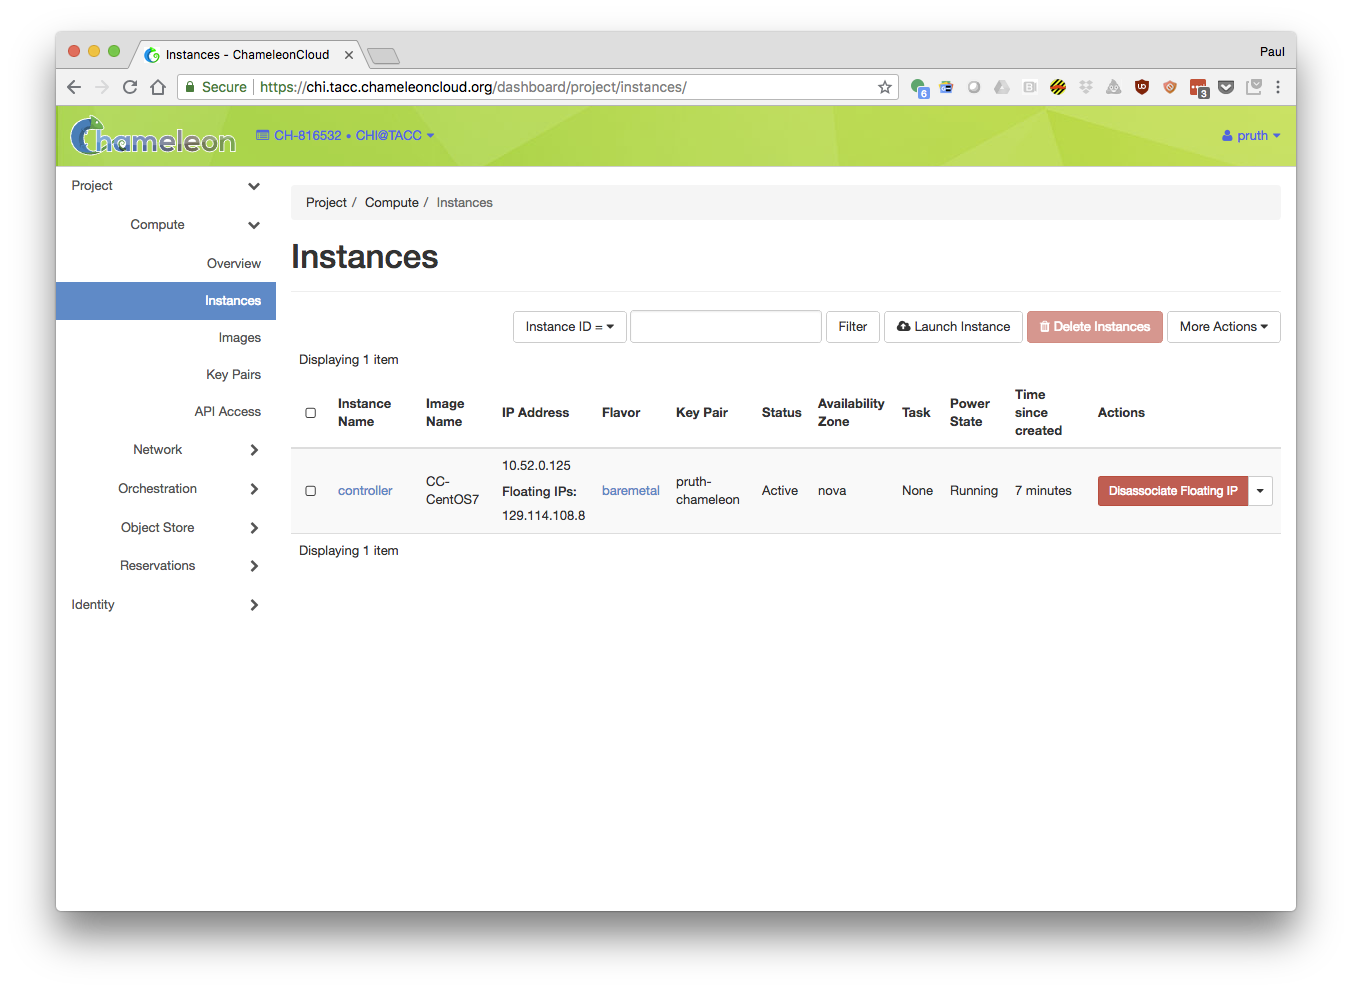
Step 1: Deploy an OpenFlow controller. This example shows how to deploy the controler using the complex appliance mentioned above. However, any OpenFlow controller can be used as long as it is accessible over the Internet. The parameters in the form should be set similar to what is in the image below. The result will be an instance named "controller". Note the floating IP of the controller instance. The IP will be necessary to configure an OpenFlow network that connects to the controller.
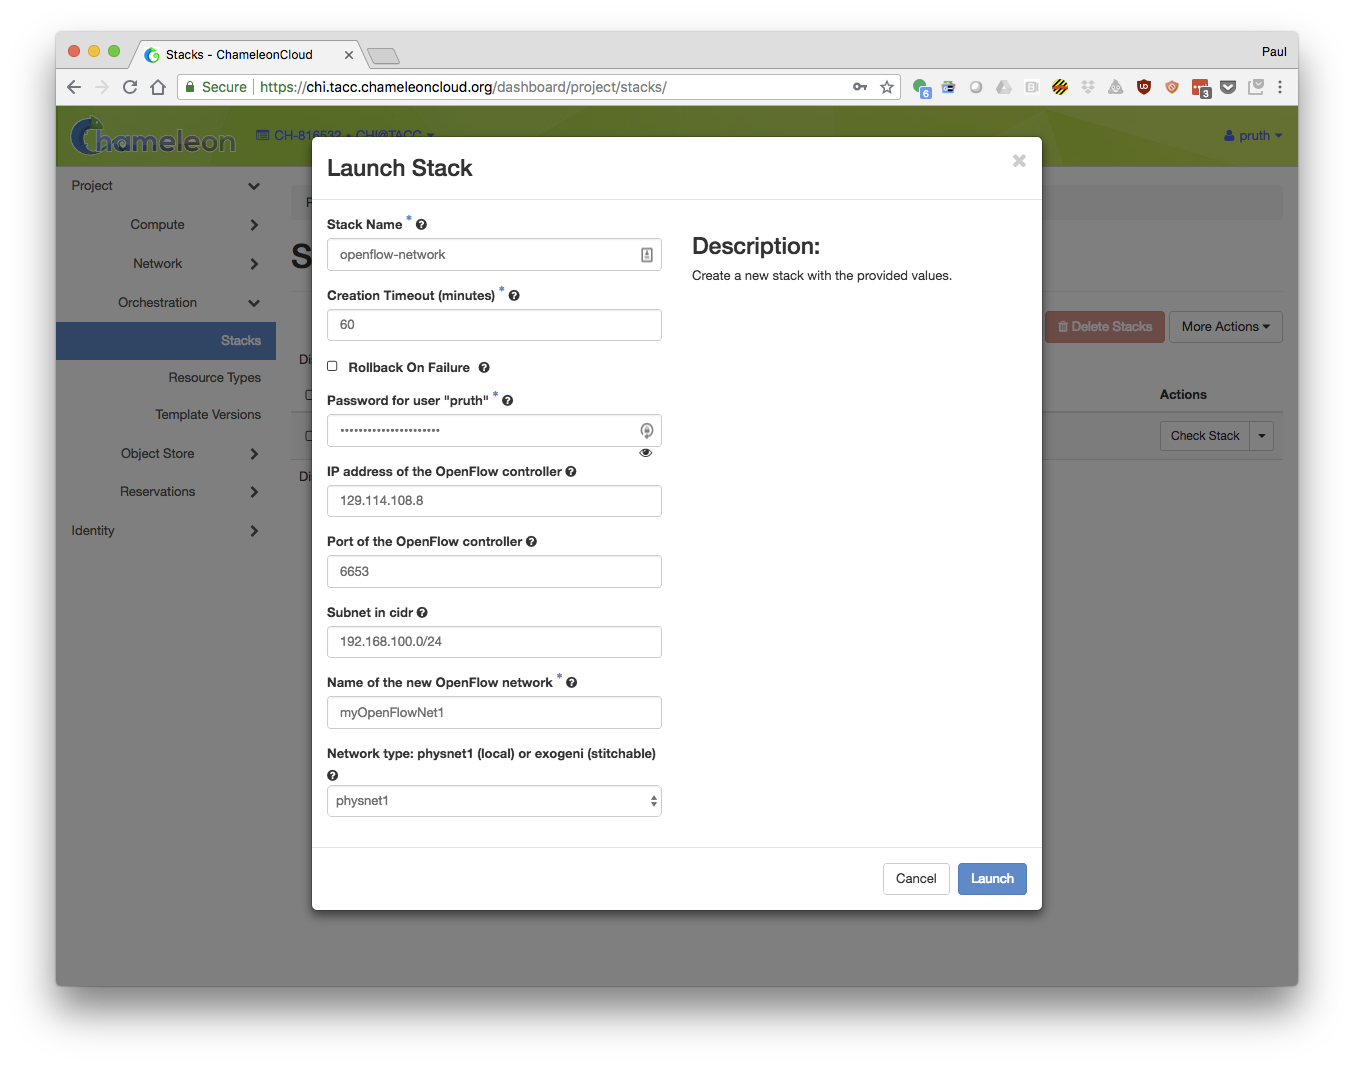
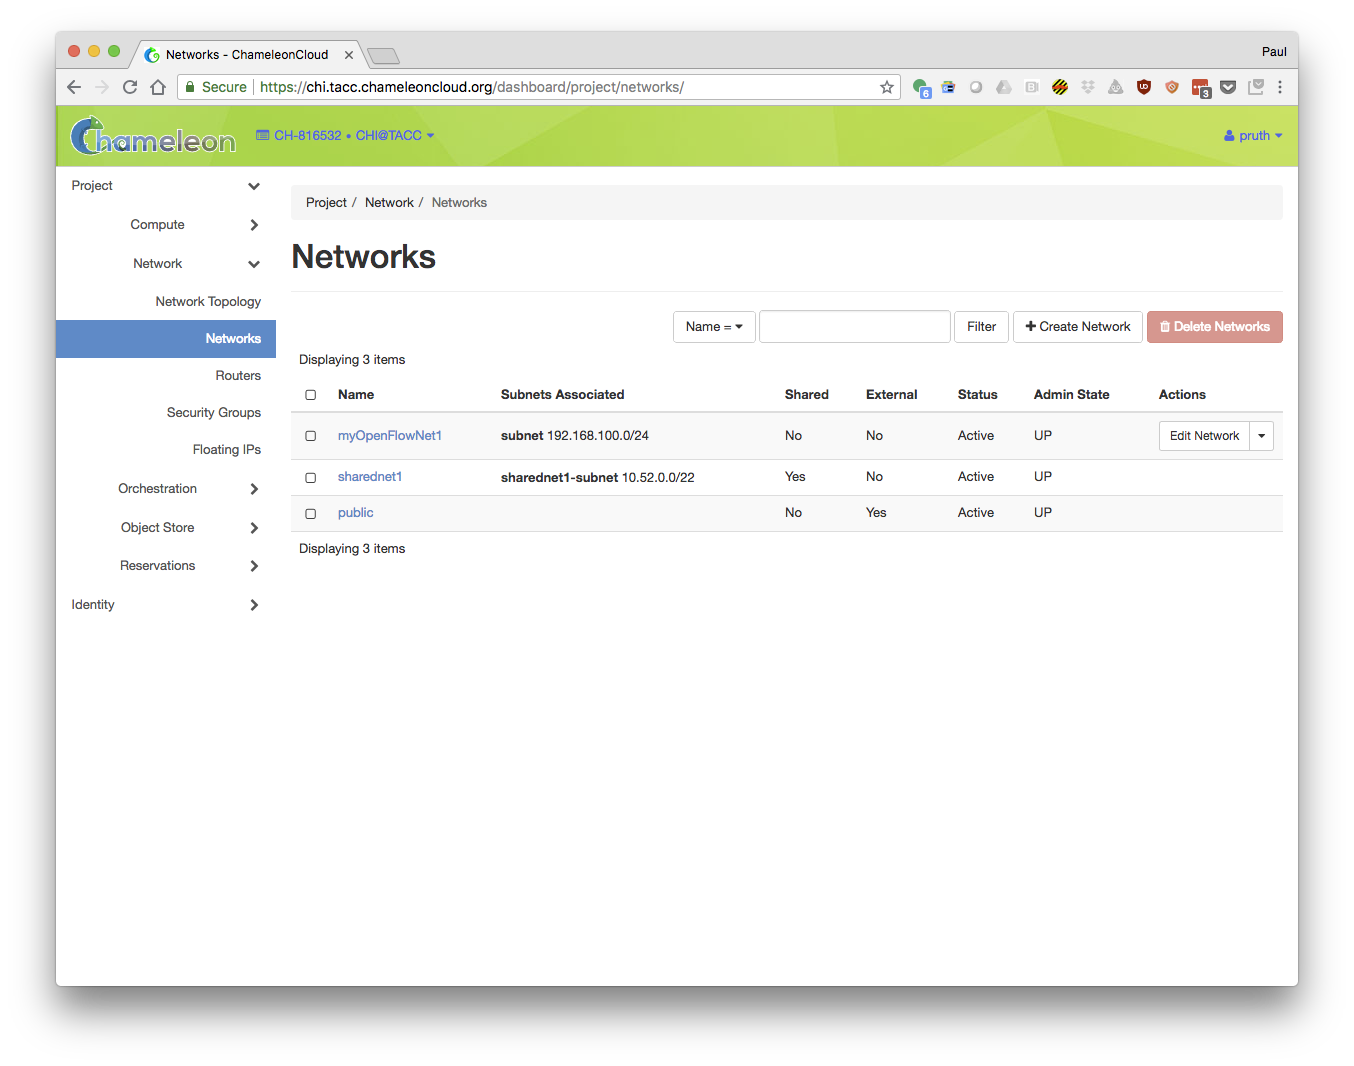
Step 2: Create the network using the OpenFlow BYOC Network appliance. Fill in the stack's form with the IP and port number of your controller. The result of this stack will be a network that you can now use when creating new instances.
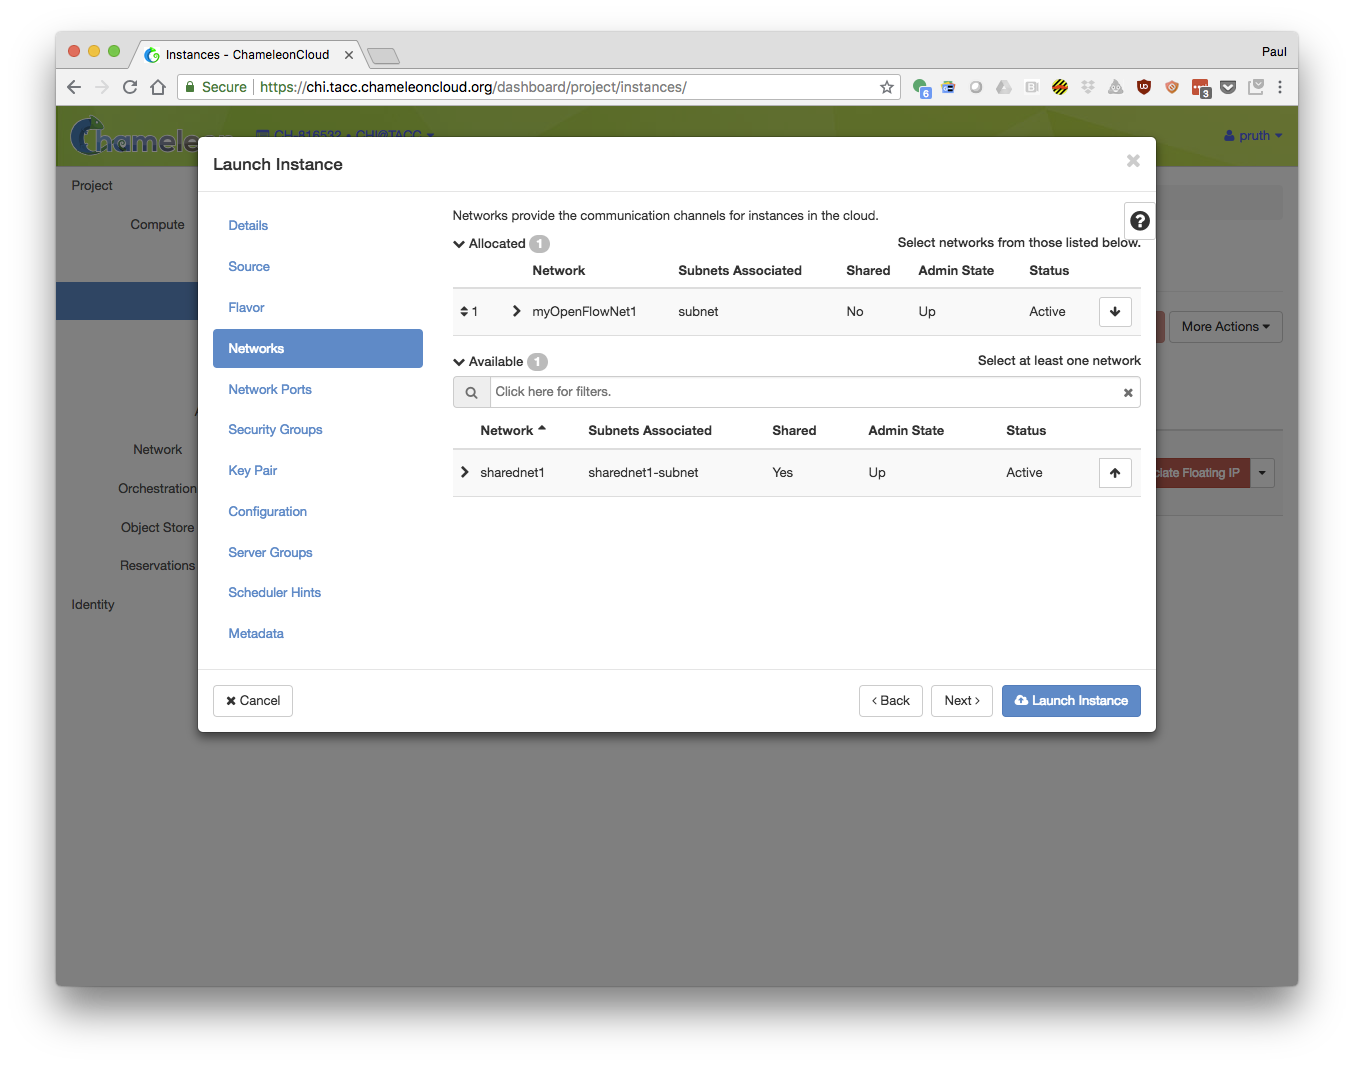
Step 3: Create new instances connected to the new network. Your new network will now be available and listed when you create new compute nodes.
Special notes and warnings
Interested users should be warned that all OpenFlow switches have their unique quirks and our Corsas are no exception. If you are having problems porting your controller to Chameleon, check the Chameleon documentation for a list of quirks that we have identified.
No comments